How to Frag a Hammer Coral: Step-by-Step Approach

A hammer coral frag being cut from a larger colony using bone cutters, with several heads visible

Quick Facts

Prerequisite
A colony with multiple well-established heads — fragging a colony with only one or two heads removes most of its growth
Key Tools
Bone cutters or a Dremel-type tool with a cutting wheel, used on the skeleton (not the soft tissue)
Timing
Cut when tissue has retracted — either naturally or with the help of a brief dip — to reduce tissue damage at the cut site
Cut Location
Through the skeleton between heads, leaving enough skeleton attached to each frag for a stable base
Post-Cut Care
Frags are often dipped, then placed in a lower-flow, lower-light area to recover before returning to display conditions
Recovery Signs
Tissue re-covering any exposed skeleton at the cut site, and polyps beginning to extend normally again
Mounting
Frags are typically glued or otherwise secured to a frag plug or rock once stable
Risk Factors
Cutting through live tissue (rather than bare skeleton between heads) increases stress and infection risk

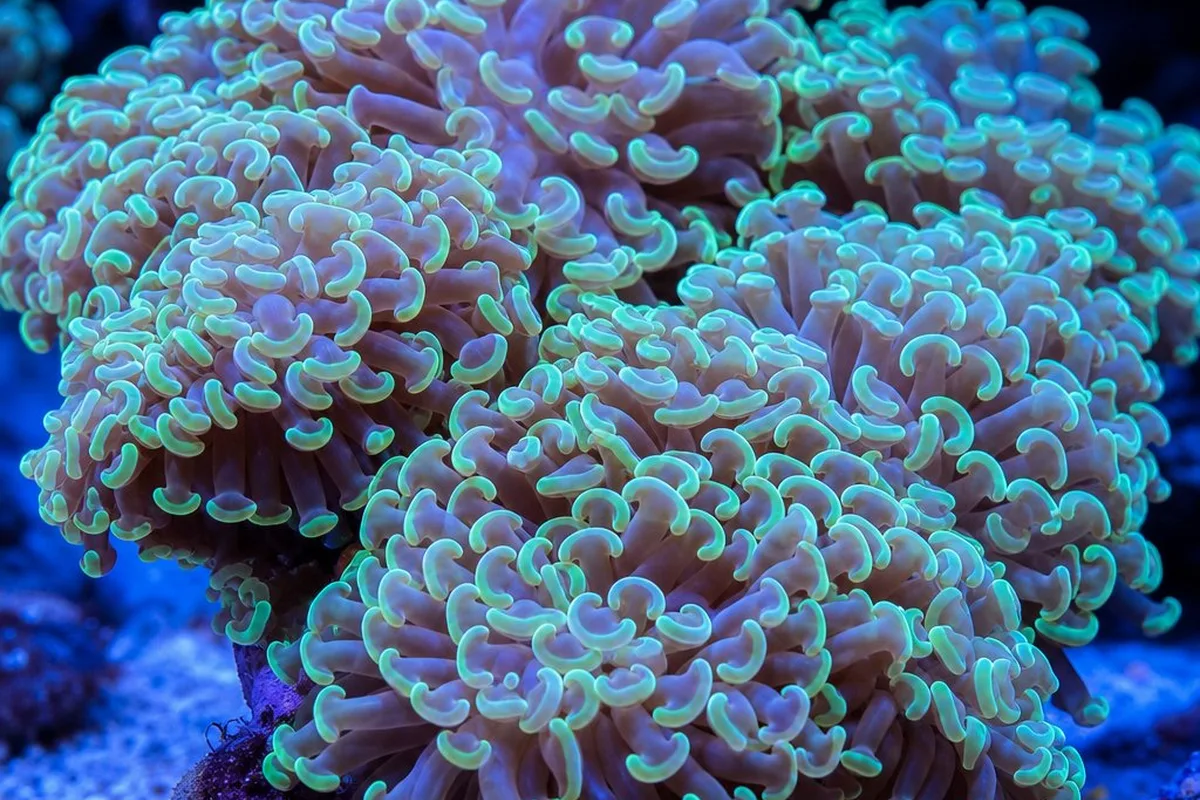
Fragging a hammer coral sounds more dramatic than it usually is in practice — most of the actual work is in the preparation and the waiting, not the cut itself.

The same approach applies to frogspawn coral, hammer coral's close Euphyllia relative — our frogspawn vs. hammer coral guide covers how the two compare, but the fragging process itself doesn't change between them.

Short Answer

Fragging a hammer coral means separating one or more heads from a multi-head colony by cutting through the skeleton between them, ideally after the coral's tissue has retracted to minimize damage to living tissue at the cut site. The basic process: confirm the colony has enough established heads to spare, let tissue retract (naturally or with a brief dip), cut through bare/thin skeleton with bone cutters or a Dremel-type tool, dip the resulting frags, and give them time in a lower-flow, lower-light recovery spot before returning them to normal display conditions. The mechanics are straightforward — the bigger factors are timing (don't frag a colony that's too small or already stressed) and patience during recovery.

Before You Cut: Is the Colony Ready?

Fragging only makes sense once a colony has multiple well-established heads — as covered in our guide on how hammer corals grow, new heads take months to develop, so fragging a colony with just one or two heads removes a meaningful chunk of growth that took a long time to build. A colony with several mature heads, where individual heads are reasonably distinct with some skeleton between them, is in a better position to be fragged while leaving the remaining colony intact and capable of continuing to grow.

It's also worth fragging a colony that's currently healthy and stable rather than one already showing reduced extension or signs of recession — fragging is itself a stressor, and adding it on top of existing stress is generally not the best timing.

The Cutting Process

  1. Identify a cut point on the skeleton between the heads you're separating — ideally bare or thin skeleton, not thick living tissue
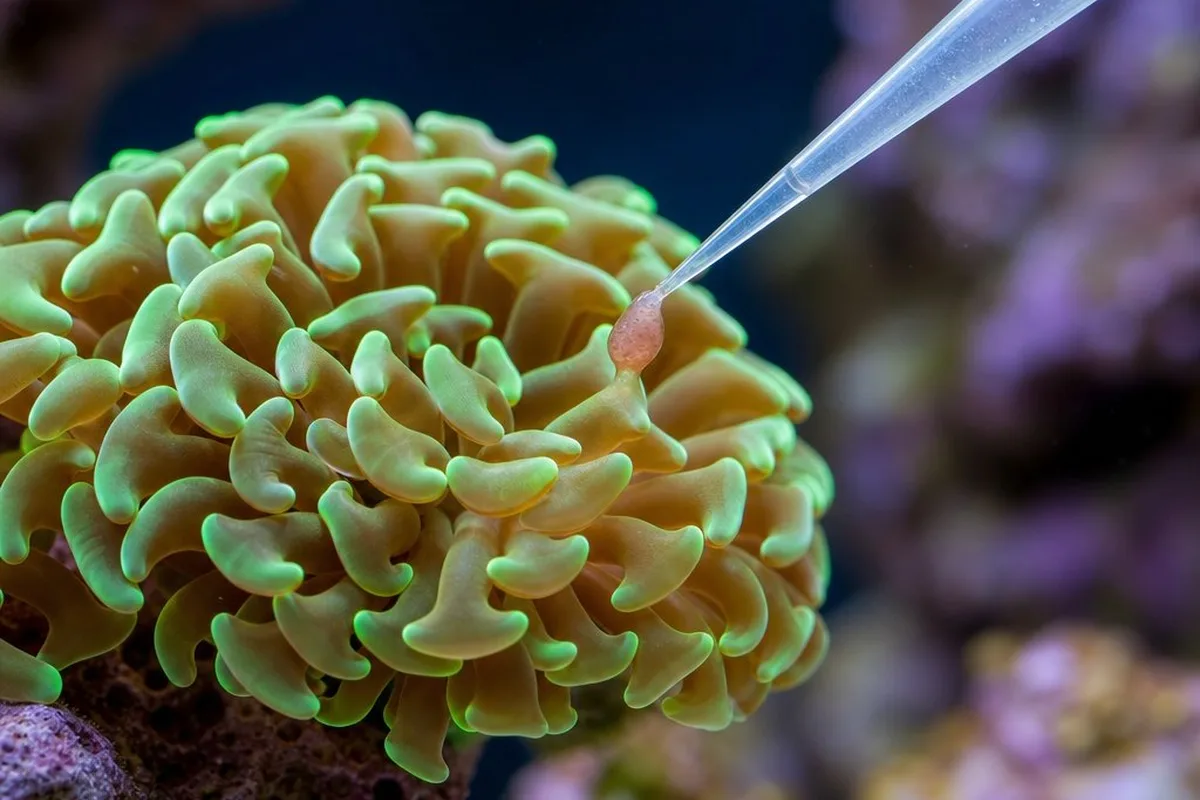
  2. Encourage tissue retraction — either let it happen naturally (sometimes helped by turning off flow/lights briefly) or use a brief dip, similar to coral dips used for new acquisitions, though here the goal is tissue retraction for a clean cut
  3. Cut through the skeleton using bone cutters or a Dremel-type tool with a cutting wheel, aiming for a clean cut with minimal contact with living tissue

The overall goal is a cut that separates the heads structurally while disturbing as little living tissue as possible.

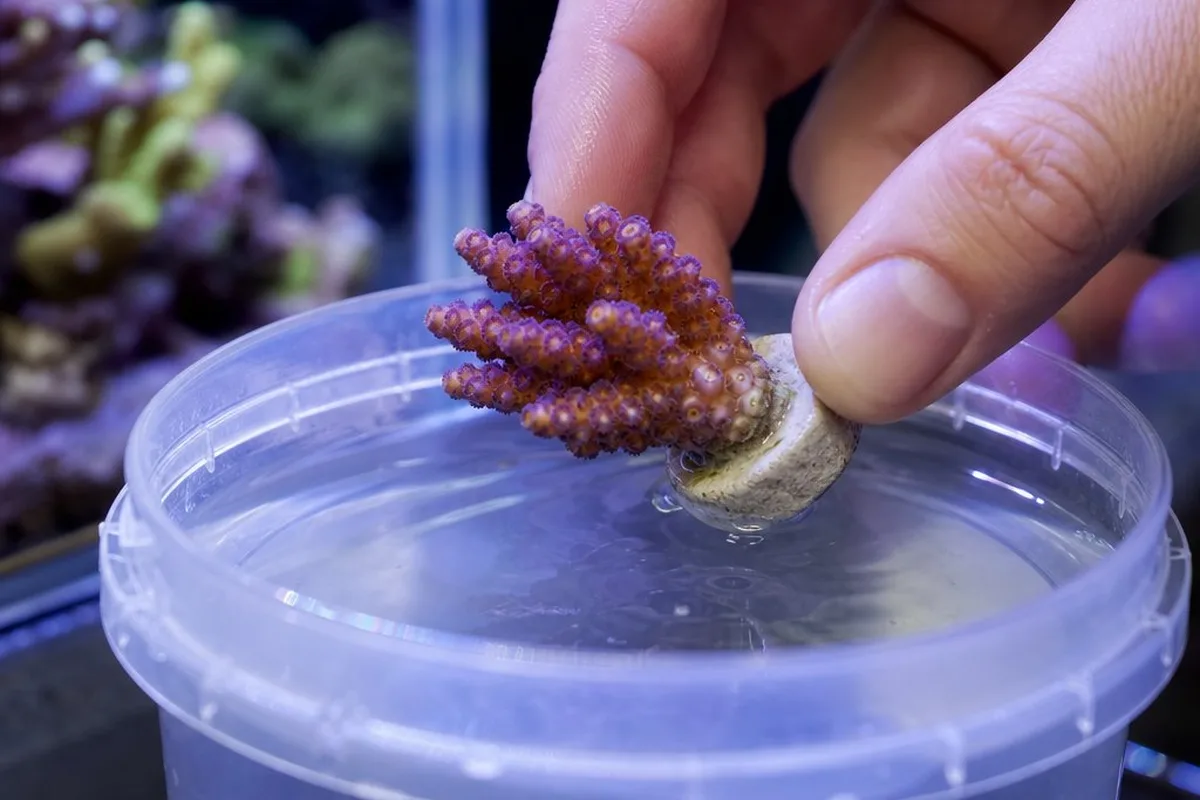
After the Cut: Dip and Recover

Once frags are separated:

  • Dip the frags — similar to the dipping process for newly acquired corals
  • Place in a lower-flow, lower-light recovery area — a separate frag tank or shaded section of the display, away from the stronger conditions of full display placement
  • Watch for recovery signs — tissue gradually covering the exposed skeleton at the cut edge, and polyps beginning to extend normally, similar to normal growth progression for a settling frag

There's no fixed recovery timeline — it depends on the size of the frag, how much tissue was disturbed during cutting, and overall tank conditions.

The Parent Colony Also Needs Recovery Time

Fragging affects the parent colony too — it's a stressful event, and a colony recovers at its own pace before resuming normal head-by-head growth. How much disruption depends on how much was removed relative to the colony's overall size. As a general practice, fragging a colony that's already healthy and stable — rather than one currently dealing with other stressors — gives both the frags and the parent colony the best starting point for recovery.

Quick Reference

  • Only frag colonies with multiple well-established heads
  • Let tissue retract before cutting — naturally or with a brief dip
  • Cut through bare/thin skeleton between heads using bone cutters or a Dremel-type tool
  • Dip resulting frags, then place in lower-flow, lower-light recovery conditions
  • Watch for tissue covering the cut edge and normal polyp extension as recovery signs
  • Fragging is stressful for both frags and the parent colony — plan for recovery time
  • Avoid fragging a colony that's already stressed or recently relocated

Frequently Asked Questions

How do I know if my hammer coral colony is ready to be fragged?

The general guideline is that a colony should have multiple well-established heads before fragging is worth considering — as discussed in our guide on how hammer corals grow, new heads take a long time (generally months) to develop, so fragging a colony with only one or two heads removes growth that took significant time to achieve, potentially setting the colony back substantially. A colony with several mature heads, where individual heads have their own clearly defined polyp and a reasonable amount of skeleton between them and neighboring heads, is in a better position — fragging can separate some heads while leaving the rest of the colony intact and still capable of continued growth.

What's the actual cutting process for separating hammer coral heads?

The general approach: identify a cut point on the skeleton between two heads, ideally where there's bare or thin skeleton rather than thick living tissue. Many keepers find it helpful to let the coral's tissue retract first — either by waiting for natural retraction (sometimes encouraged by turning off flow/lights briefly) or with a brief dip in iodine or a coral-safe dip solution, similar in spirit to the dips discussed in our guide on coral dips and aiptasia, though the purpose here is tissue retraction and a clean cut rather than pest treatment specifically. With tissue retracted, bone cutters or a Dremel-type tool with a cutting wheel are used to cut through the skeleton between the heads being separated. The goal is a clean cut through skeleton, with minimal cutting through live tissue.

What should I do with the frags immediately after cutting?

After separating heads, many keepers dip the frags (similar dips to those used for new coral acquisitions, as covered in our coral dip guide) and then place them in a lower-flow, lower-light recovery area — sometimes a separate frag tank or a shaded section of the display — rather than immediately returning them to full display conditions. This gives the cut edges time to heal (tissue gradually recovering over the exposed skeleton at the cut site) without the added stress of strong flow or intense lighting. Recovery time varies, but signs of recovery include tissue beginning to cover the cut edge and polyps extending normally again, similar to the kind of normal recovery progression you'd expect from a healthy frag settling into a new spot.

Is fragging stressful for the parent colony, and how long does recovery take?

Fragging is a stressful event for both the removed frags and the parent colony, though a healthy colony with adequate remaining heads typically recovers over time, resuming its normal head-by-head growth process. There's no fixed recovery timeline — it depends on how much was removed relative to the colony's overall size, and on the colony's general health and tank conditions afterward. As a general practice, it's reasonable to avoid fragging a colony that's already showing signs of stress (reduced extension, recession, or recent relocation) — fragging adds an additional stressor on top of whatever the colony is already dealing with, and waiting until the colony is in a stable, healthy state before fragging is generally the more conservative approach.

Sources & Further Reading

  1. LPS Coral Care & Identification — Reef2Reef
  2. Coral Fragging Techniques — Reef Builders
Hektor Jorgo

About the Author: Hektor Jorgo

Co-Founder & Marine Biologist

Hektor is a co-founder of Sea Life Planet and has kept reef and freshwater aquariums for over 15 years. He holds a background in marine biology and focuses on species care accuracy, water chemistry, and tank husbandry.