Buying your first coral frag is a small purchase that comes with a surprising number of questions — what to check before handing over money, what to do with it the moment you get home, and how worried to be if it doesn't look amazing on day one.
Short Answer
A coral frag is a small piece of a larger coral colony, mounted on its own so it can grow into an independent colony — a direct consequence of corals being colonial animals where fragments can each grow on their own. Before buying, a quick visual check for pests, recession, or unusual discoloration is worth doing. After buying, dipping (covered in detail in our coral dip guide) and a careful rinse-and-inspect step help prevent hitchhikers from reaching your tank, and mounting with reef-safe glue followed by placement that accounts for the coral's future size gives the frag its best start. A new frag looking less extended or "closed up" for a while after placement is common and often just acclimation.
What a Frag Actually Is
As covered in our overview of what coral is, most corals kept in reef tanks are colonial — a coral "individual" is really a group of genetically identical polyps connected to and supporting each other. A frag (fragment) is a piece cut, broken, or naturally separated from a larger colony and mounted on its own, typically on a small ceramic, resin, or rock frag plug. Given the right conditions, that piece can grow into a full colony in its own right.
This is the basis of most coral propagation in the hobby — keepers fragment corals they already have (our hammer coral fragging guide shows what this process looks like for one common LPS genus) both to manage colony size and to create new frags to trade or sell, and buyers get a smaller, often less expensive starting point than a full colony.
Before You Buy: What's Worth Checking
A quick visual inspection — in person if possible, or via clear photos/video for online purchases — can save some headaches later:
- Pests and hitchhikers — look at the frag itself and its base rock for anything that doesn't belong: small anemones, worms, or anything moving unexpectedly
- Tissue recession — areas of bare skeleton on an otherwise living coral, similar to what's discussed in our brain coral skeleton guide, can indicate an existing health issue (though a small, stable area of recession isn't necessarily disqualifying)
- Discoloration — pale, bleached-looking tissue can indicate stress or zooxanthellae loss, the kind of process covered for anemones in our bleaching guide, which applies to corals as well
None of these are automatic dealbreakers on their own, but they're useful context for both the purchase decision and for what to expect from the frag in its first weeks in your tank.
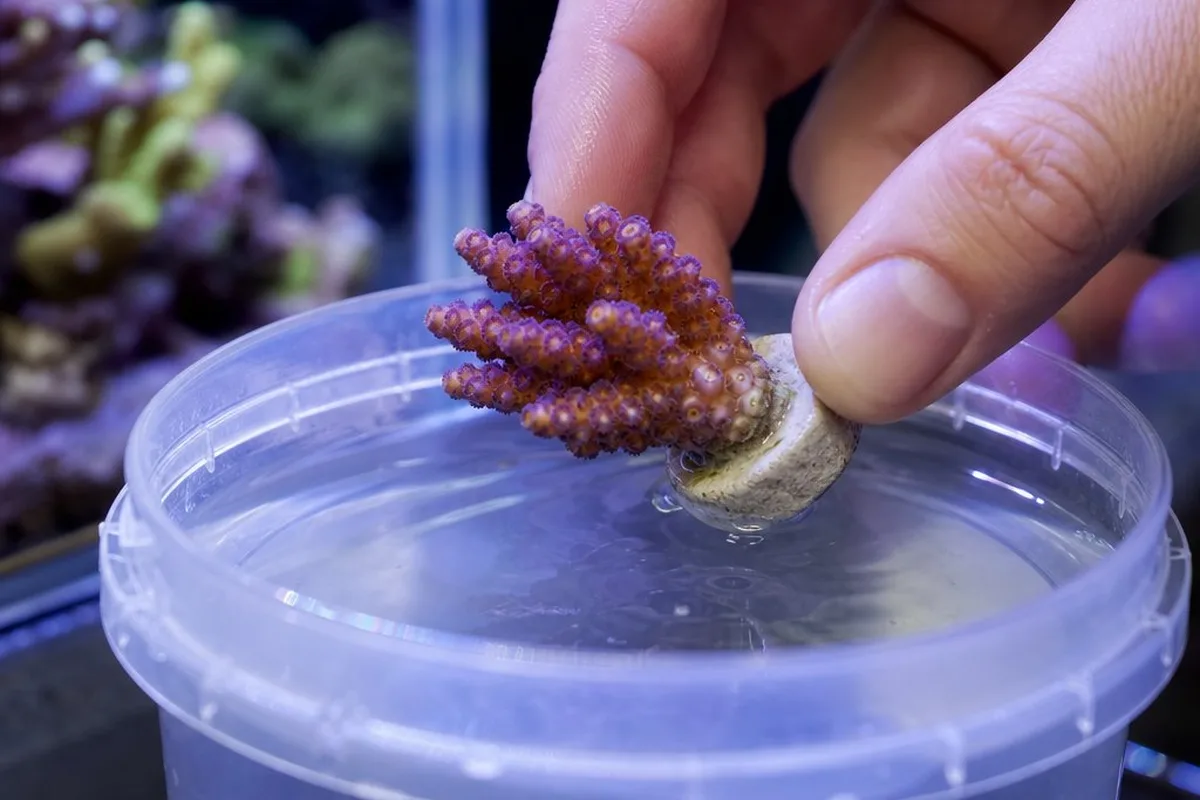
Dipping and Inspecting: The Step That's Easy to Skip
Even a frag that looks completely clean can carry hitchhikers too small to easily spot — aiptasia, flatworms, or pest snail eggs are common examples. Our coral dip and aiptasia guide covers this in detail, but the short version for a new frag is:
- Dip the frag in a coral-safe treatment solution, following the product's instructions
- Rinse it afterward
- Inspect again, looking specifically for anything dislodged by the dip
This sequence matters because dipping and inspecting are complementary, not redundant — a dip can dislodge something an inspection alone would miss, but the post-dip inspection is what actually catches it before it ends up in your tank.
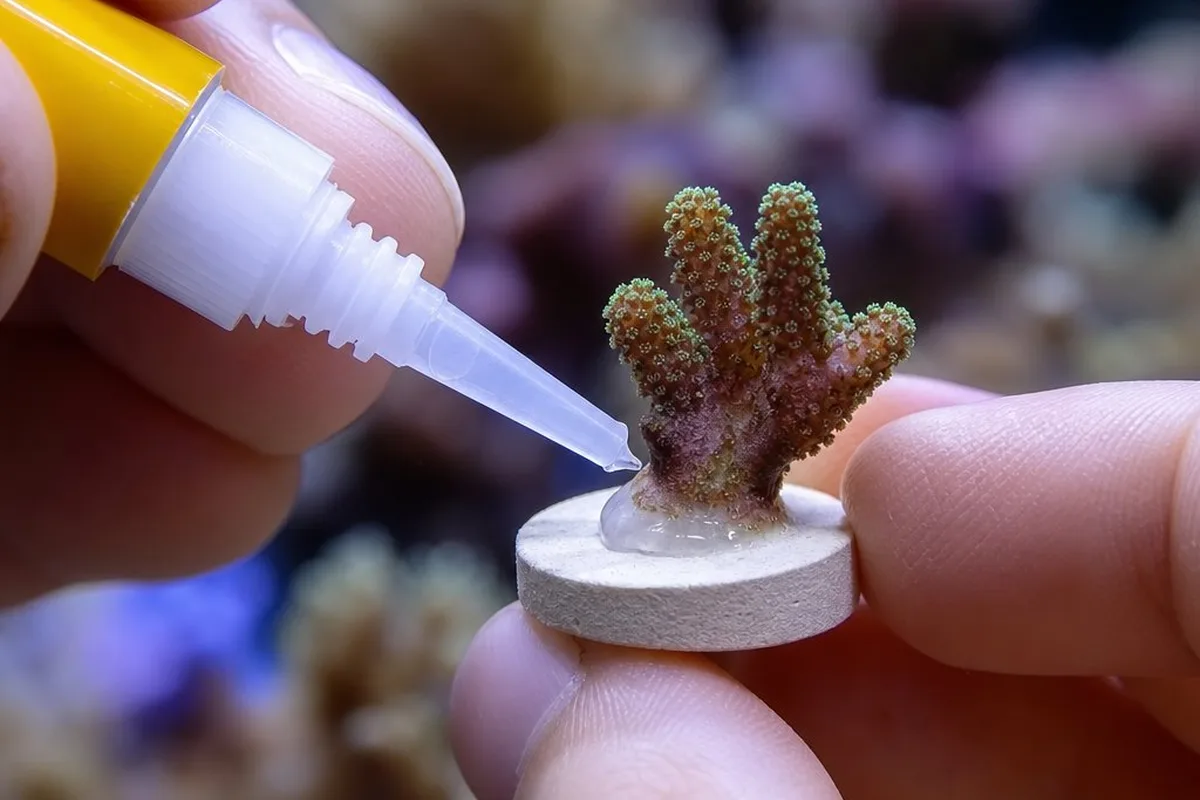
Mounting and Placement
Frags are typically attached to rock with:
- Cyanoacrylate (super) glue — fast-curing, widely used, and covered in more detail (including reef-safety considerations) in our super glue guide
- Two-part epoxy putty — also commonly used, particularly for larger or more awkwardly shaped pieces
For placement, it helps to think beyond the frag's current size:
- Eventual colony size — a small frag can grow considerably; leaving room for that growth avoids needing to relocate it later
- Sweeper tentacle reach — for species like hammer and torch corals, the coral's reach at night can extend well beyond its daytime footprint and affect neighboring corals
What to Expect in the First Days and Weeks
It's common for a newly placed frag to look less extended, duller in color, or generally "closed up" for a period after placement — especially if it's been shipped or moved between tanks with different lighting and flow. This is often a normal acclimation response rather than a sign of trouble. That said, it's still worth monitoring the frag over the following days and weeks to confirm it's gradually extending and settling in, rather than continuing to decline — the same general "watch for the trend, not just one observation" approach covered in our guide on reading coral recession.
Quick Reference
- A frag is a small piece of a larger coral colony, mounted separately to grow into its own colony
- Before buying, check for visible pests, tissue recession, and unusual discoloration
- Dip new frags before adding them to your tank, then rinse and inspect again afterward
- Mount frags with reef-safe cyanoacrylate glue or epoxy putty
- Plan placement around the coral's eventual size and any sweeper tentacle reach
- A new frag looking "closed up" for a while after placement is often normal acclimation
- Monitor over days and weeks for the trend (improving vs. declining), not just one look