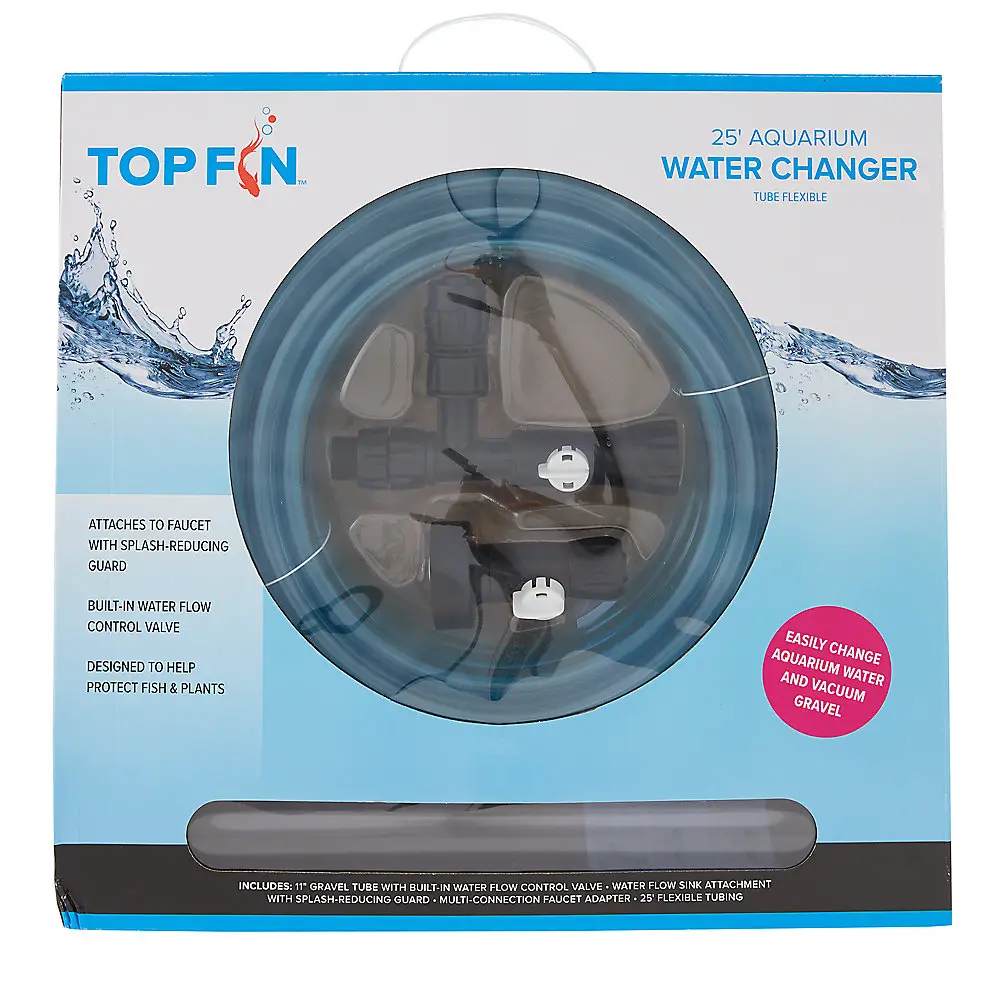
Top Fin Water Changers are relatively inexpensive and it’s a necessary component for both the function and longevity of your aquarium setup. They typically come equipped with a splash-reducing guard, water flow control valves, gravel tube, faucet adapter, and flexible tubing.
They’re not too difficult to operate either, so long as you ensure that everything is on pretty tight. It will definitely lighten your load when it comes to cycling your water, which is a routine you should establish early on as a new aquarium owner.
What Does a Water Changer Do?
Your water changer does exactly what the name implies that it does. It helps you change the water in your aquarium without having to remove a certain percentage using buckets before hauling them to the sink to dump.
Most water changers are essentially vacuums that run from your aquarium to a deposit point. The deposit point is usually a sink, or whatever is close enough that you can hook the vacuum into a faucet.
Once you have vacuumed a necessary amount of water, usually 10% to 15% for a typical water cycle, the faucet will stream fresh replacement water directly into your aquarium. It basically just makes your job easier and, in a perfect world, it’s simple to set up and operate.
Water changers aren’t really necessary for small tanks. If you have a ten-gallon tank or less, a standard gravel vacuum is more than enough to do the trick and you can dump small buckets of water in the sink.
Much larger tanks can be done manually as well, but a water changer effectively reduces the workload on yourself.
How Do You Assemble a Top Fin Water Changer?
Before you get started, you will have to unbox and assemble the parts. You will need to attach the water flow assembly to your faucet. Go ahead and submerge the other end (the gravel tube) into the aquarium.
The other end of the gravel tube attaches to the water flow assembly’s perpendicular tube. That’s it. Once you have your water assembly attached to the faucet, there is nothing else you really have to assemble.
How Do You Clean a Fish Tank with a Suction Hose?
Using a Top Fin Water Changer is pretty simple. Of course, it was designed that way. A water changer that made changing the water more difficult would be a waste of time for potential customers.
- Be sure you are close enough to a sink and faucet that your gravel hose can reach
- Hook the faucet valve to your faucet
- Connect the gravel tube to your valve
- Open the valve
- Remove the cap from your aquarium
- Place the intake tube in your aquarium
- Open up both levers
- Turn your faucet on
- Start working your tube into the gravel by pushing directly into the gravel and pulling back out slowly
- Repeat the process over and over until your gravel is clean
- Stop siphoning the water once you have pulled about 15% from your tank
- Rinse your hose out
- Cut the valve off at the sink
- Keep the faucet lever on the aquarium side open
- Turn your faucet on again
- Replace the 15% of the water you removed
It sounds a little more complicated than it really is. The biggest thing you need to remember is when to open the valves. When the valve at the faucet is open and water is running through it from the faucet, it creates a vacuum in the portion of the tube running to the aquarium.
Once you shut the valve from the attachment on the faucet, the faucet will redirect into the aquarium, filling it back up.
What is the Top Fin Water Test Vial For?
Whenever you are replacing your old water with fresh, cycling your tank, you need to keep an eye on the state of your water. Healthy water is essential for the happiness of your fish. Yout Top Fin Water Test Vials are good for just that, keeping an eye on the status of your water.
That includes alkalinity, pH levels, ammonia, nitrites, and nitrates. These are all very important parameters to keep track of and your fish will definitely thank you for going through the extra effort on their behalf.
How Do You Use a Water Vial Test?
Like most things that Top Fin manufactures for your aquariums, using the water test vials is pretty easy. The vials are simply useful for pulling water from your aquarium and testing the amount of water volume in the vial.
- Use a syringe or a bubble pipette to draw water from your aquarium and place it in the vial
- There should be an indicated volume for the vial (for testing purposes)
- Add the solution, designed for testing, to the vial as well
- Mix the solution and water in the vial according to the directions
- Compare the coloration of the water to the color bands on the test kit placard
- Use the vials as frequently as needed to test the water in your aquarium
This is especially important when you are making water changes, especially if you are drawing water into your aquarium directly from a source of tap water. Unfortunately, tap water is known for being high in chlorine, which is something that’s deadly to the fish.
The pH in your aquarium is an important factor as well and it differs from one end to the other depending on the kind of fish in your aquarium and what their requirements are. And you also want to keep your ammonia below zero parts per million.
Ammonia is toxic to fish, regardless of the kind of fish that populate your aquarium. Test vials help you monitor all of these levels and ensure that your aquarium is a suitable home at all times.
All Things Considered
A Top Fin Water Changer is a device of convenience, helping you cycle water in and out of your tank with ease, rather than having to do it by hand or with buckets. Cycling your tank should be a weekly habit, as well as monitoring the status of the water. Your ability to do both is essential to your fish’ survival.


